Step 1. From the start menu open Microsoft Outlook 2013. Click ‘File’ in the left navigation/margin, and then click ‘+ Add Account’.
Step 2. Select ‘Manually configure server settings or additional server types’ which can be found at the bottom of the screen. Then click the ‘Next’ button
Step 3. Select POP or IMAP by clicking the radio button
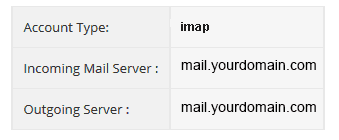
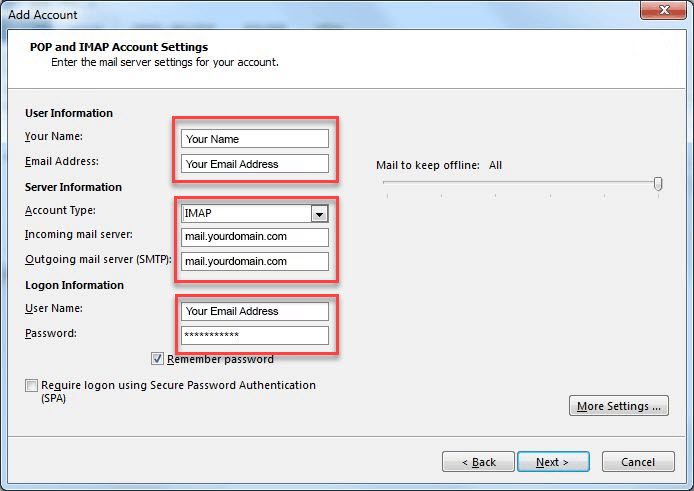
Step 4. Enter the Following Information in the correct fields
Your User Information
Your Server Information
Your Logon Information
Step 5. Click on the ‘More Settings’ button.
Step 6. Select the ‘Outgoing Server’ tab in the navigation bar. Then check the box beside ‘My outgoing server (SMTP) requires authentication’ and ‘Use same settings as my incoming mail server’ by selecting the radio button.
Step 7. Click the ‘OK’ button
Step 8. Click the ‘Next’ button
Step 9. The system will automatically check the settings, when finished click the ‘Close’ button.
Step 10. Click the ‘Finish’ button.
Note. If you are still encountering problems sending mails you may need to change your SMTP Port – info on how to do this can be found HERE